Development to Test to Production is a tale as old as time. Even though we all hold the software development lifecycle dear to our hearts, sometimes the process just doesn’t go as smoothly as it does in our heads. Have you ever had a tricky solution deployment get you down? Have you ever wished for a faster, simpler, and more user-friendly way to efficiently deploy your solutions from one environment to another? Do you wish all deployment-related information lived in a single place? If you answered “Yes!” to any of those questions, you are in luck- look no further than Power Platform Pipelines! In this blog post, we’ll walk you through deploying your first solution with Power Pipelines. We will review how to install Power Pipelines into the Host environment, configure the Development and Target environments and the Deployment Stages, and deploy a simple solution from one environment to another. Using this foundational knowledge of Power Pipelines, the potential to simplify even the most complex and business-critical solution deployments will skyrocket. Let’s get started!
How to Set Up Power Platform Pipelines in Your Development Environment: Installation of Power Platform Pipelines
One of the things that makes Power Pipelines so simple is that it only needs to be installed in one environment. It’s recommended that a single environment, known as the Host environment, be the environment that Power Pipelines is installed in, keeping this environment separate from the development, test, and production environments. For the sake of brevity, I’m going to be installing power pipelines directly into my development environment.
Within the selected Host environment (in my case, my development environment), navigate to the Power Platform Admin Center and select Dynamics 365 apps from the left navigation. Then, search for Power Platform Pipelines. Select this app, then select Install to install Power Pipelines into the Host environment.
Ensure that you are either a Power Platform administrator or Dataverse system administrator to complete this step
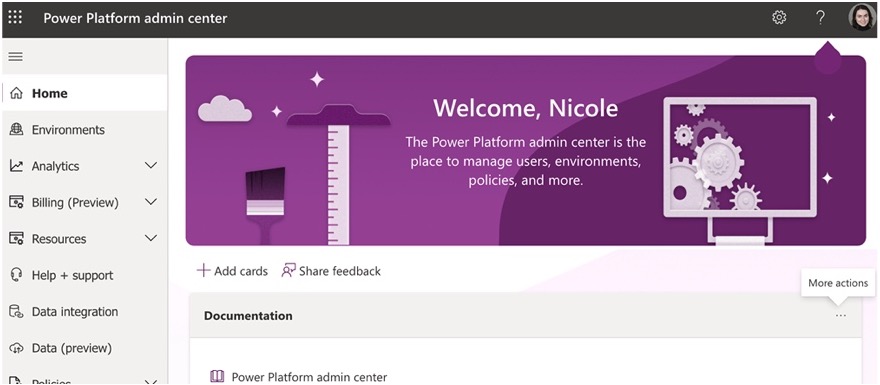
The Power Platform admin center
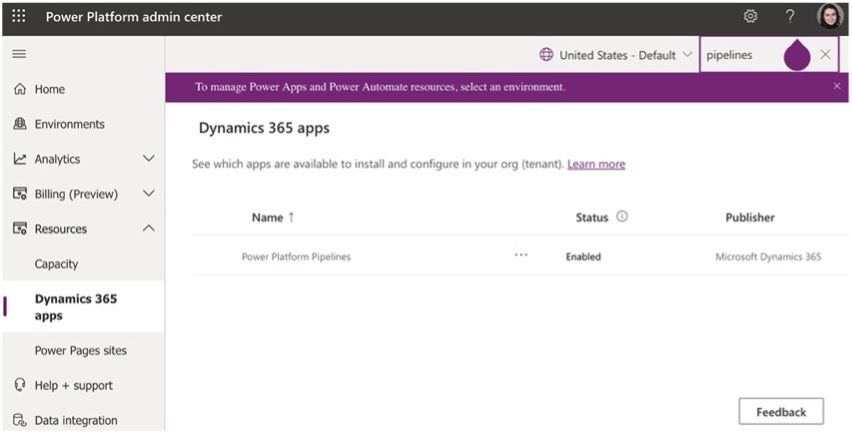
Install Power Pipelines from Dynamics 365 apps in Power Platform admin center
Configure your first Power Platform Pipeline
Another amazing feature of Power Pipeline is its reusability and scalability. After a Pipeline is configured once, it can be re-used to deploy the same solution time and time again. Its use can even be scaled to other solutions within the Development environment with no extra steps. Ultimately, the efficiency of just one Power Pipeline is incredible!
1. Navigate to the Solutions list in the Host environment. You should now see the “App Deployment Model App” solution in the list. Select this solution, select Apps from the Objects menu on the left, then select the “Deployment Pipeline Configuration” Canvas App.
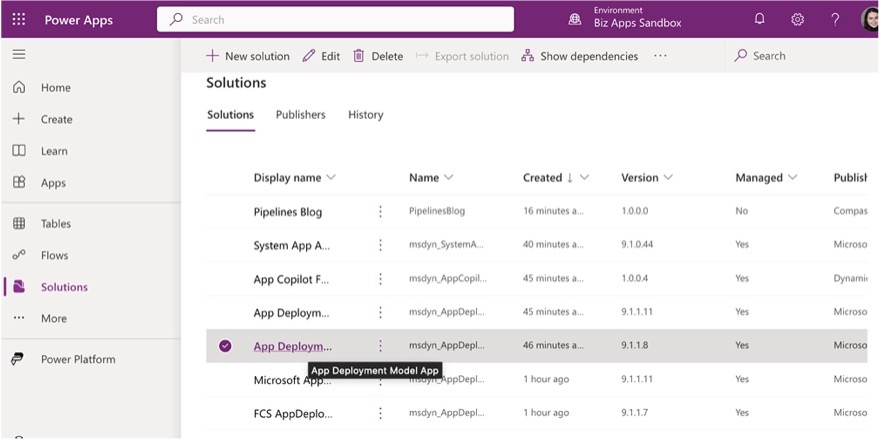
App Deployment Model App in the Solutions list in the Host environment
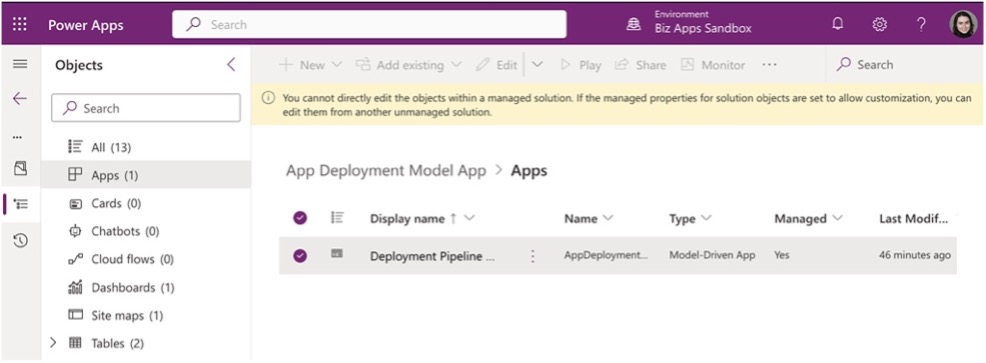
Select Deployment Pipeline Configuration
2. The Deployment Pipeline Configuration app will open. Select Play from the top right corner.

Select Play in the Deployment Pipeline Configuration app
3. Select Environments from under Pipeline Setup in the left navigation to begin configuring the environments that will be involved in your pipeline, known as Deployment Environments. I’ll be starting with my Development environment (which is also my Power Pipelines Host environment). Select New to configure this environment.
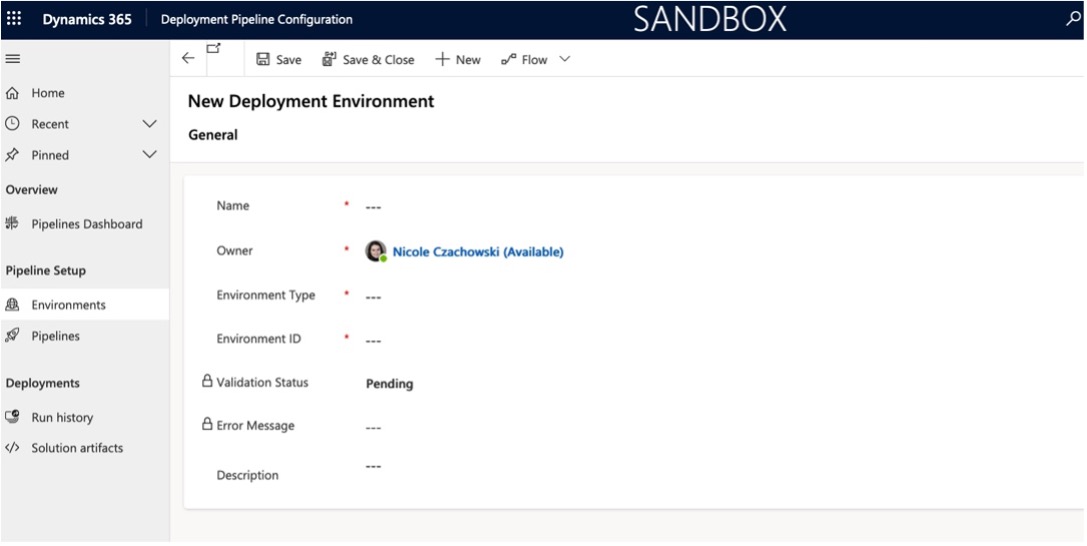
New Deployment Environment configuration
To find the Environment ID, which is necessary to configure a Deployment Environment, select the Settings icon in the top right corner of the screen, select Developer Resources, and then find Environment ID.
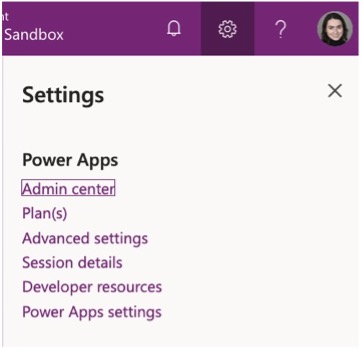
Settings menu
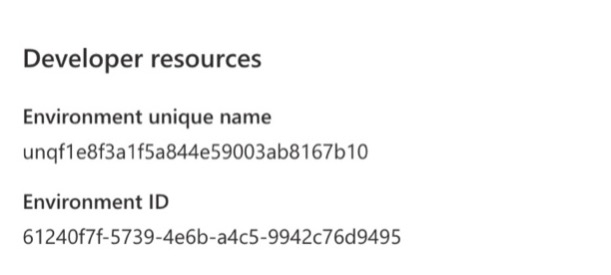
Developer resources with the Environment ID
Below is the filled out New Deployment Environment form for the Development environment:
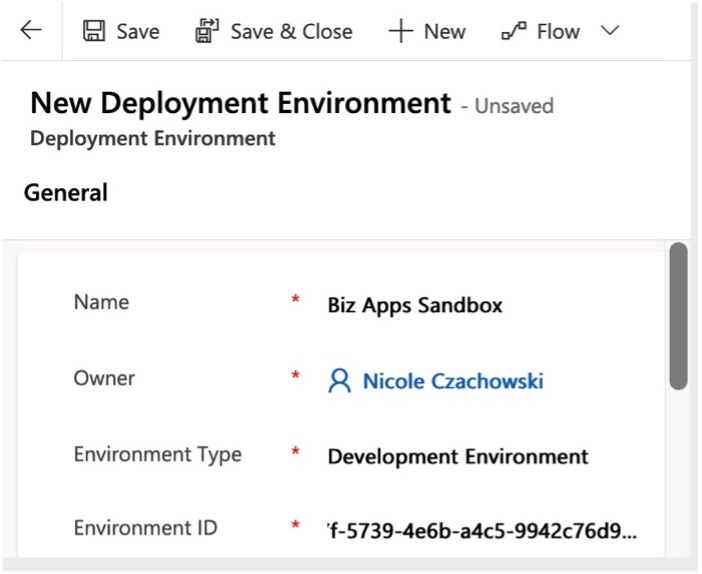
The filled out New Deployment Environment form for the Development environment
4. Select Save, then select the 3 vertical dots and click Refresh. Ensure that the Validation Status now reads Success.
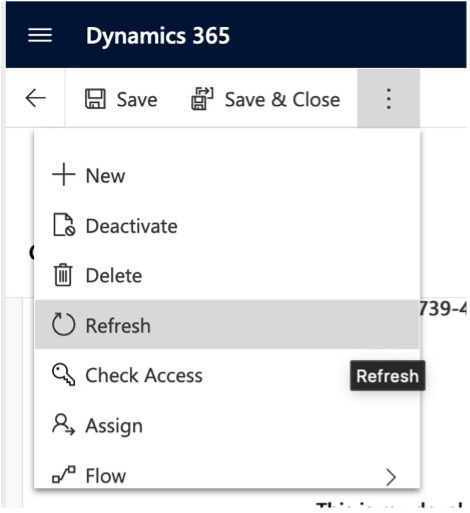
Refresh is found under Options (three dots) menu
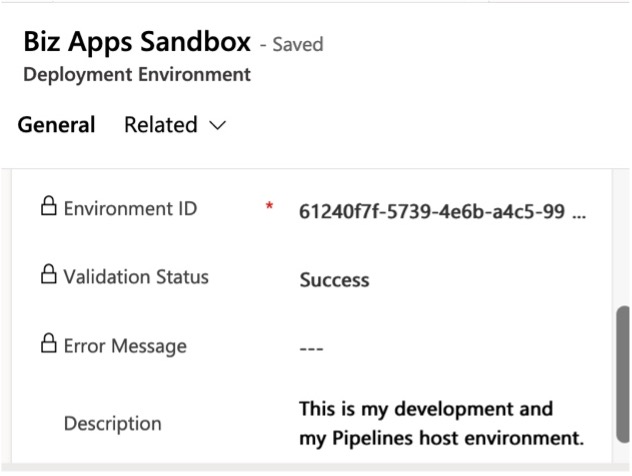
Validation Status now reads Success
5. Repeat these steps for your Target environment, which is whichever environment you would like to move your solution to.
Ensure that this Target environment is enabled as a Managed Environment, or else the deployment to this environment will not succeed.
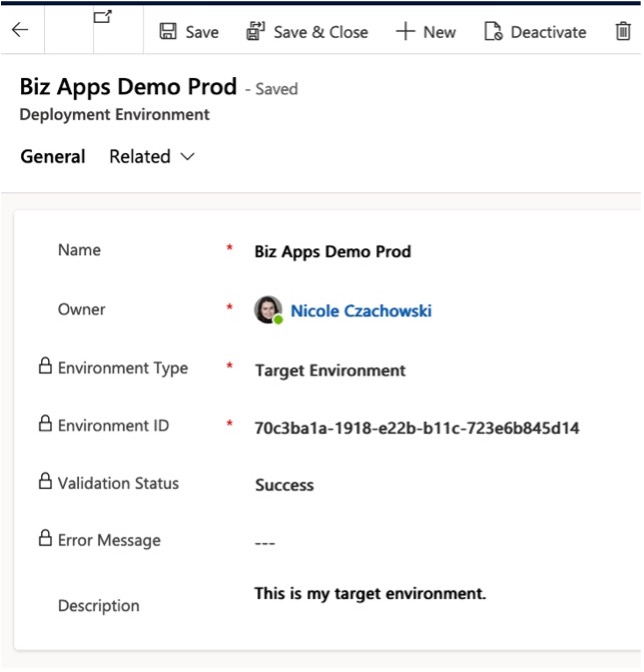
Ensure that this Target environment is enabled as a Managed Environment
6. Next, we will set up the Deployment Pipeline itself. Select Pipelines from the left navigation then select New. Give your Pipeline a name and a description, then select Save.
7. Now that your Deployment Pipeline is created, we must link it to the existing Development environment that we already configured within Power Pipelines. Scroll to the Linked Development Environments section and select the 3 vertical dots. Then select Add Existing Deployment Environment. From there, select your Development environment.
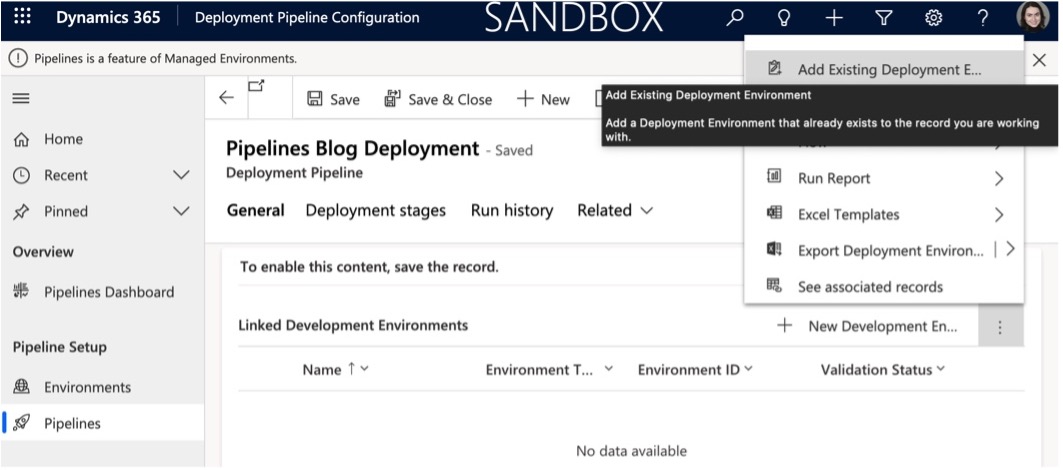
Select Add Existing Deployment Environment

Select your Development environment
8. Next, we will set up Deployment Stages. For my use case, I will only be deploying from my Development environment to my UAT (Test) environment, so I’ll just create one Deployment Stage called “Deploy to UAT”. Scroll to the Deployment Stages section and Select New Deployment Stage.
Note that you must have at least one stage, and you can have up to 7 stages.
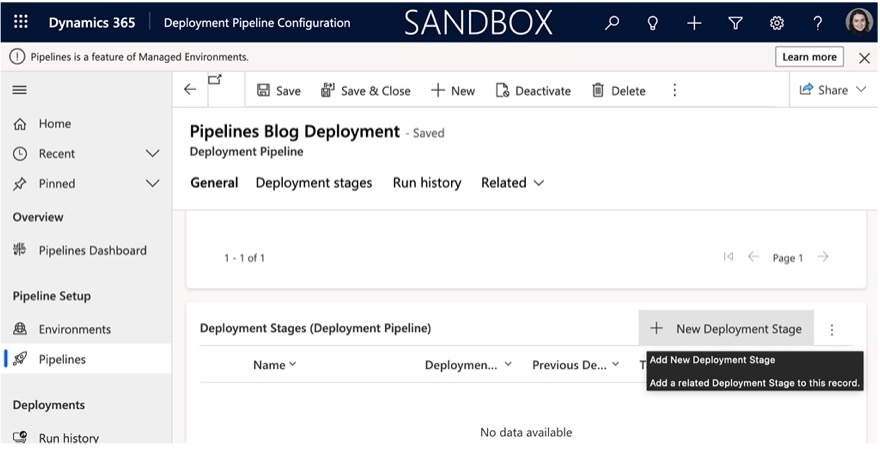
Select Add New Deployment Stage
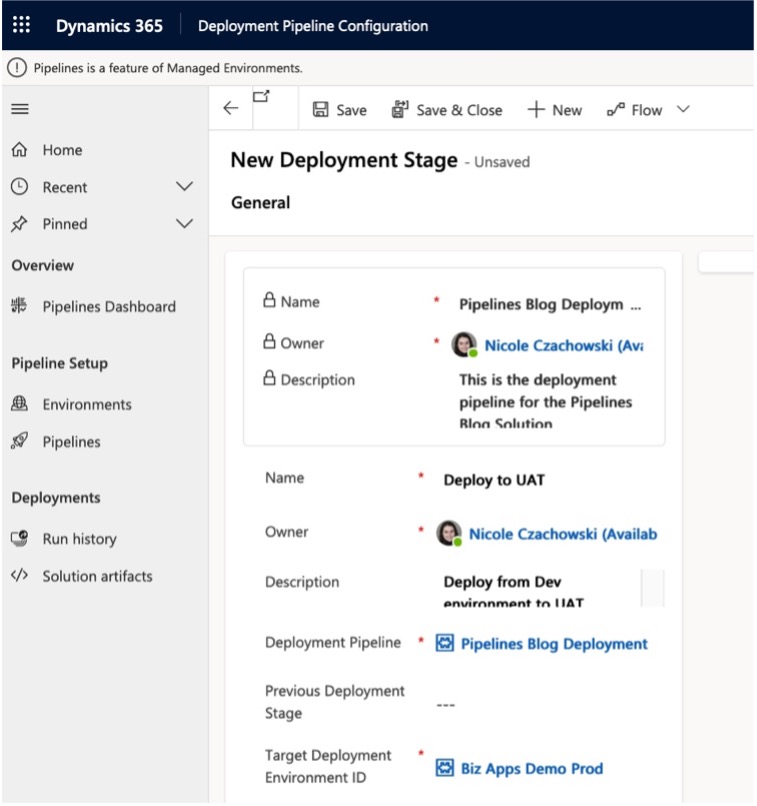
Deploy to UAT Deployment Stage details
Run Your First Power Platform Pipeline
1. Now that your Pipeline is configured, it’s time to actually run it! Navigate to the Solutions list in your Development environment and select your desired solution, select Pipelines from the left navigation, then select “Deploy here”.
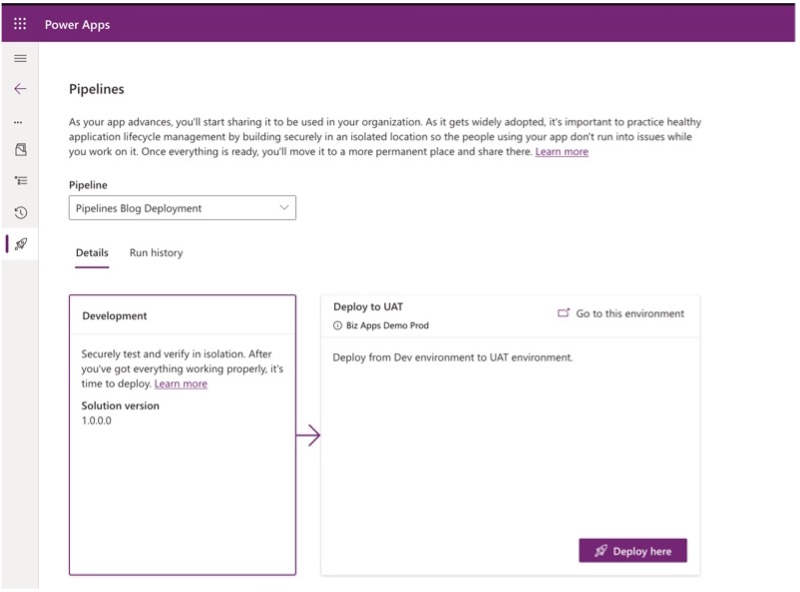
Select Pipelines and then Deploy here
2. The Deployment window will appear. Select Next to go to the next step.
You have the option of either deploying now or later. For this blog post, I’ll be selecting Now, but the ability to schedule deployments is just another amazing feature of Power Pipelines!
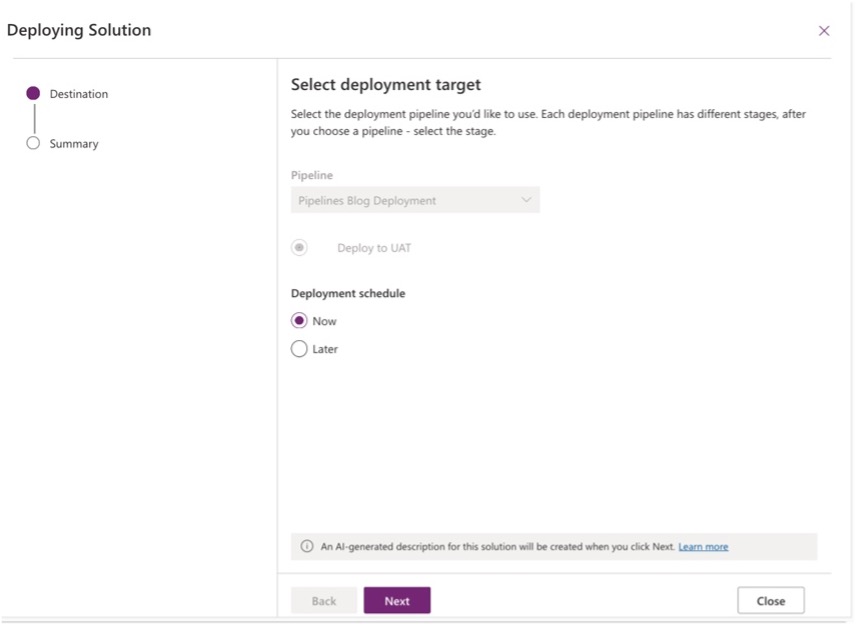
Choose to deploy now or schedule for later
3. If you have any errors, Power Pipelines will let you know before the solution is deployed and give you important information that can help you resolve your error.
In my case, my error was a result of having the Creator Kit installed in my Development environment, but not in my Target environment. To resolve this error, I installed the creator kit in my target environment and then returned to my Host (development) environment to reinitiate the pipeline.
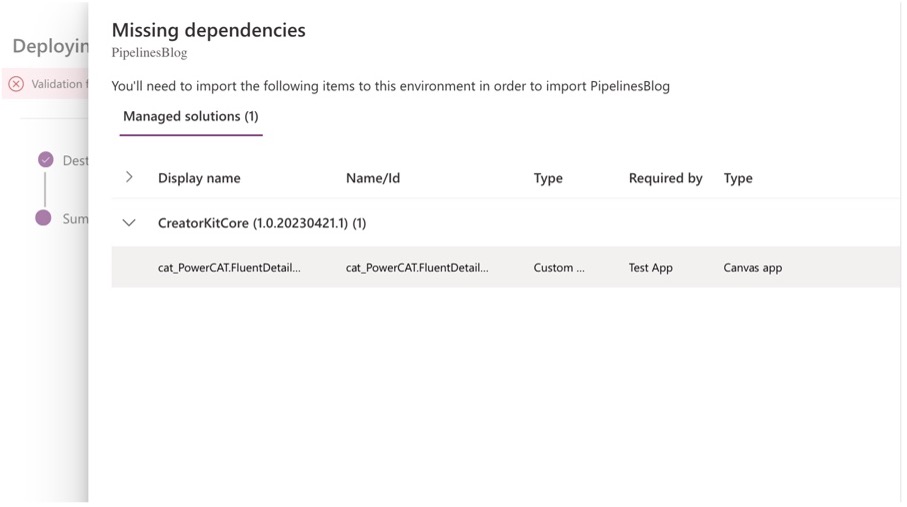
Missing dependencies notification
4. After resolving any errors, review the Summary screen then select Deploy.
The Deployment Notes section is automatically generated by Power Pipelines and includes a list of all the components within the solution.
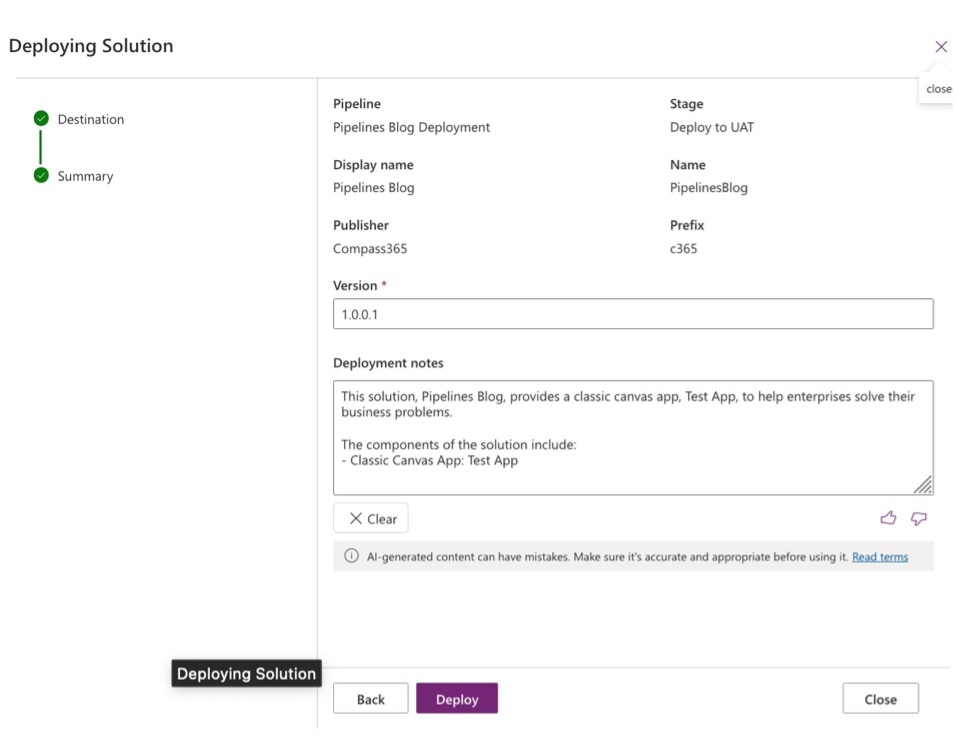
Summary screen with Deployment notes
5. The status of the deployment will be displayed on the screen. Once it has been deployed, the screen will be updated.
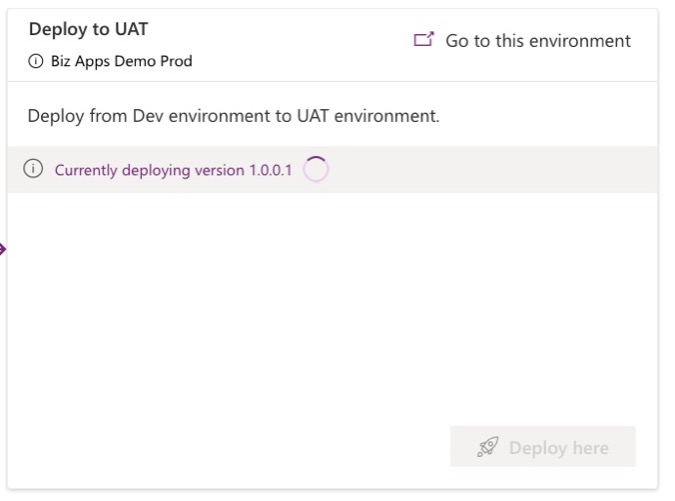
Deployment in progress window
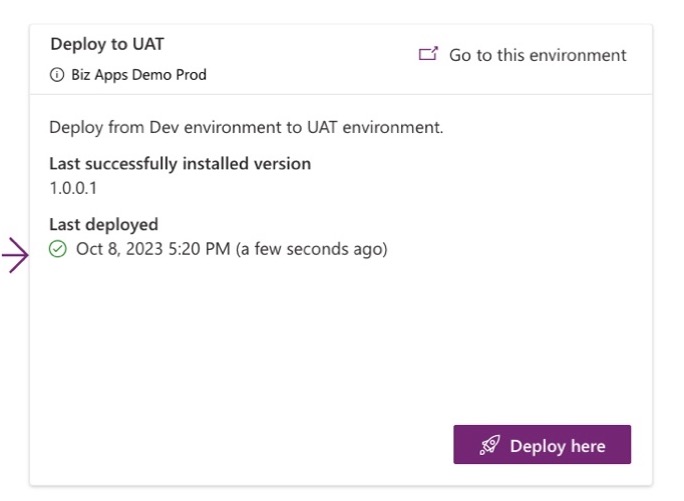
Successful deployment
6. In the Run History section, Power Pipelines keeps a useful record of all previous deployments.
When a deployment is selected, any previous error messages are displayed, along with detailed information about the error that occurred. How great is that?

Power Pipelines Run History log
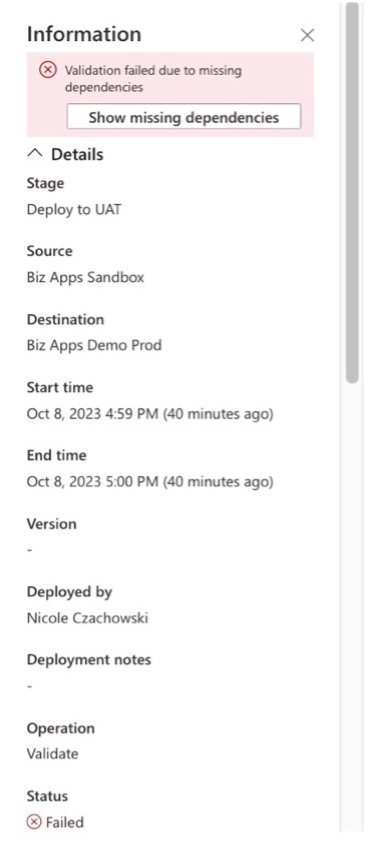
Previous error message
7. To wrap up this process, navigate to the Target environment and ensure that your newly deployed solution is present and accurate.

Newly deployed solution is present and accurate
You’re Ready to Start Leveling Up Your Deployments with Power Platform Pipelines!
As shown in the steps above, installing, configuring, and using Power Platform Pipelines is simple, user-friendly, and has the potential to level up anyone’s deployments. If you’d like more information about Power Pipelines, read our more in-depth post, Get the Most Out of Power Pipelines With Power Automate’s “When an action is performed” Dataverse Trigger! It could help you and your business.
If you are new to Power Platform Pipelines and would like assistance, reach out at any time to discuss Compass365’s Power Platform Consulting Services . We are happy to help. Contact us to arrange for a complimentary consultation.
Compass365, a Microsoft Gold Partner, delivers SharePoint, Microsoft Teams, and Power Platform solutions that help IT and Business leaders improve the way their organizations operate and how their employees work.

